Building a portable ambient conditions sensor

Table of Contents
This post describes how I put together a bluetooth connected ambient conditions sensor using a microcontroller and CircuitPython. Although this device can be used to monitor ambient conditions anywhere, I built it with a specific purpose in mind: monitoring temperature and humidity inside plastic containers storing 3D printer filament spools.
Some 3D printer filaments are very susceptible to high humidity conditions (e.g. ABS) and can quickly degrade. Manufacturers recommend to keep them in areas with humidity conditions below 50% and ambient temperature not exceeding 30 Celsius. I have several of these spools stored in a couple of (supposedly) air-tight big plastic containers. Therefore, I wanted a device with the following features:
- Portable.
- Capable of sensing both humidity and temperature.
- Visual indicator for when any of the sensed values goes beyond pre-defined thresholds.
- Capability to use it either wired or as a stand-alone device (i.e. battery powered).
- Wireless connectivity.
These features make for a versatile sensing device that can be used to monitor ambient conditions in a room, inside plastic containers or even inside an enclosure holding equipment sensitive to high temperatures.
Hardware #
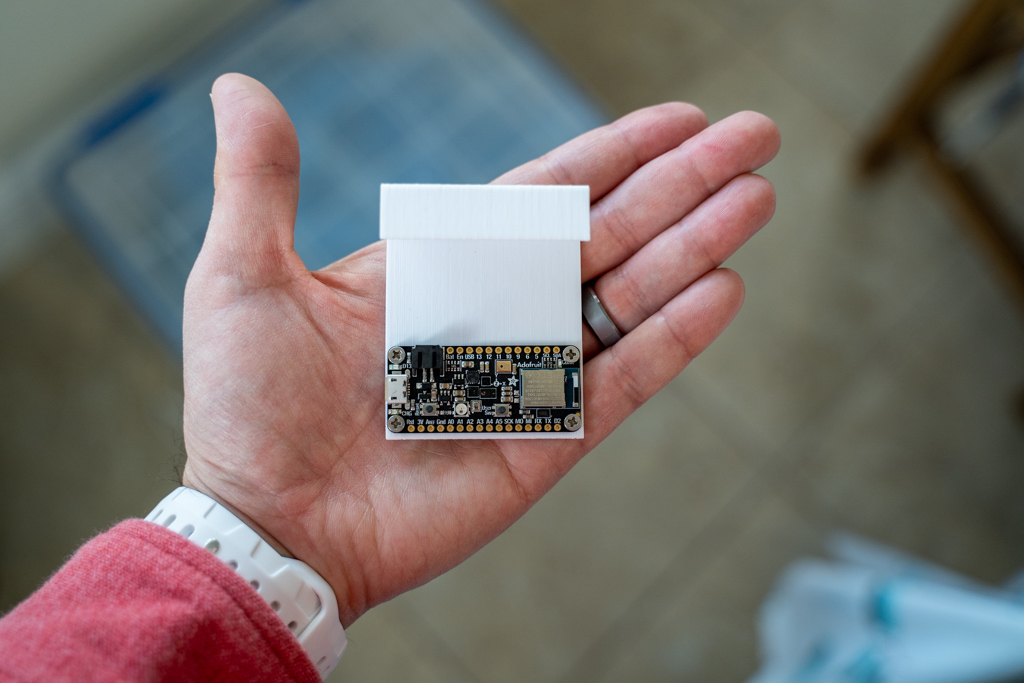
There are several manufacturers building microcontrollers capable of carrying out this task. I decided to go with Adafruit as they have a board that would be perfect for this project: Adafruit Bluefruit Sense board.
The board has built in Bluetooth and a plethora of sensors (Accelerometer/gyroscope, magnetometer, proximity, light, color, gesture, sound, humidity and temperature). It is also fairly fast (definitely fast enough for this application).
Some additional components for this project:
- One Micro USB to USB A cable for programming the board and provide power to it.
- Optional: A Li-on battery compatible with the board. This one would do, but check its dimensions first to make sure it’s not too big for the board or your application.
Software #
Because I value my sanity, I decided to go with CircuitPython instead of Arduino as the programming language. Adafruit offers CircuitPython libraries compatible with this board, which greatly simplifies the coding process.
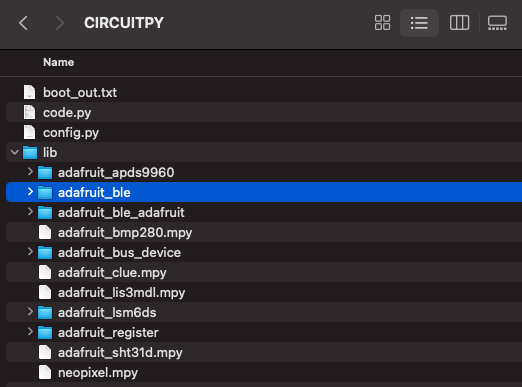
Connect the board to your computer through a USB cable. Make sure you have the latest version of CircuitPython installed on the board (installation instructions here). Additionally, download the latest version of Adafruit’s library bundle. Unzip the files to a temporary folder and copy only the needed libraries to the lib folder on the board (see below). Also, copy the script and configuration files to the board’s root folder (these files can be downloaded here).
The image below shows how the board’s folder structure will look like:
Main script files #
code.py #
This is the main script and it’s run by the board every time it boots. Here is a high level overview of what it does:
After initializing all services and sensors, the script constantly reads temperature, humidity and motion (more on this later). Since there is no integrated screen on the Bluesense board to show ambient conditions, I programmed it to blink in different colors under the following circumstances:
- Blue: humidity above defined threshold.
- Red: temperature above defined threshold.
- Yellow: battery level below threshold (to be used when connected to battery power).
- White: Movement is sensed.
The last item above needs a bit more explaining: Since there is no way to see the charge level when the device is powered by a battery, if the battery is completely discharged the device may give the false impression that all conditions are within the defined parameters (i.e. no blinking), when in fact the device has turned off. To work around that, I programmed the board to blink when some movement is detected. Calibration took a while to get just right so that taping the board (or the plastic enclosure containing it) will make it blink bright white a couple of times, letting you know it’s still alive.
Temperature and humidity, along data from the other sensors, can be closely monitored by connecting to the device via Bluetooth. You’ll need Adafruit’s Bluefruit Playground App to do so (available for both iOS and Android). Once connected to the device, just select the variable you want to monitor. Keep in mind that as long as there is a Bluetooth connection between the board and the phone, the blinking features described above are disabled.

config.py #
Ambient conditions value thresholds are defined in a separate file named config.py. Here is how mine is setup, feel free to change these values as you see fit:
# Humidity Limit should be < 50%.
# Temperature Limit not recommended above 25 C.
# Temperature check interval in milliseconds.

settings = {'humidity_limit': 50.00,
	'temperature_limit' : 28.00,
	'battery_limit' : 3.29,
	'temp_check_interval': 10000}
Assembly #
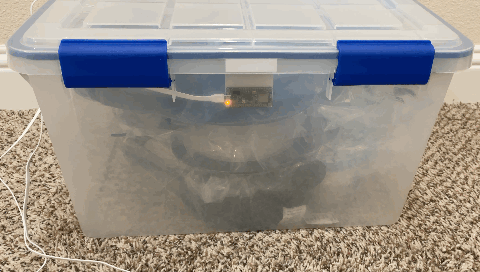
I designed and printed a simple “j” shaped holder to hang the board inside the plastic container where the 3D filament spools are stored. The board is attached to the plastic holder using four screws.

Power is provided by a flat USB cable that runs out of the box into a wall charger. The device works just as well when powered by a LiPo battery, and like other Adafruit’s feather boards, it can charge the battery when USB power is provided.

Keep in mind this is the simplest configuration. The Bluesense board could simply be fed by a lithium-ion battery, and a TFT FeatherWing could be added to see measured values on screen (see image below). In that case, the CircuitPython code would need to be expanded to account for the TFT screen (more info here).
