Background
A few months ago I started looking for ways to alleviate the wrist and shoulder pain I’ve been dealing with for a long time. I adjusted my home office desk, chair and computer monitor to be as ergonomic as possible. I did some research on ergonomic computer peripherals and tried out several of them. It didn’t take me long to land in the fascinating and addictive world of mechanical keyboards.
I was aware of mechanical keyboards, but didn’t know how active and fervent the community is. I grew particularly interested in split keyboards because of their ergonomic benefits (i.e. typing with at least 5 inches between hands greatly helps with wrist stress, in my opinion).
In the lines below, I’ll describe how I built this wireless mechanical keyboard, the components used and some reasoning behind my choices. However, I won’t go in detail on all the options available. Mechanical keyboards are probably one of the most customizable gadgets nowadays. Once you’ve made your decision on size/format (80% TKL, 60%, 40% of a regular keyboard size) and model, you can choose keycaps, switches, switch profile (low, standard), lighting options, OLED displays, cases, switch/top plates, firmware and even the controller chip.
Here are the general keyboard choices I made:
- Split keyboard: 40% of a full size keyboard (i.e. no number pad or function keys). I wanted a compact keyboard that I can take with me when traveling. However, since the firmware allows for keyboard layers, almost all keys from a full size keyboard are available, including the number pad.
- Model: Corne keyboard with PCB top plate.
- Key Switches: Kailh low profile “Choc” switches, " Red" (linear, i.e not “clicky”). I picked these because I didn’t want a “tall” keyboard requiring a wrist support for comfortable use. Low profile switches also make the keyboard a bit more portable. However, in this case, I chose portability over convenience because this switch type has less keycap options available (for now).
- Keycaps: MBK Low Pro. These are highly regarded by the keyboard community and for good reason. They are one of the most comfortable keys I’ve used.
- Connection: Wireless, Bluetooth. I wanted to have the option to connect to more than one device at the same time, which the installed Firmware allows.
- Controller: Nice!nano (wireless connection).
- Firmware: ZMK.
All components were bought at Boardsource, MK Ultra and Digikey.
Hardware
There are some additional items needed to put together this particular keyboard. Most mechanical keyboards are wired, which simplifies the building process. However, I wanted a wireless multi-device mechanical keyboard, and since there isn’t an off-the-shelf option currently available, I decided to build my own. Therefore, the following components are also required:
- Two Li-ion 1,200 mah batteries.
- Two switches.
- A couple of 22 AWG wires.
- Battery connectors.
These parts should be assembled inside the 3D printed case (more on the case below). But before doing that, we need to connect the battery, the wire adapters and the on/off switch. Then, the loose wire terminals in one end (black and red wires on top in the picture below) should be soldered to the appropriate controller’s pins (i.e. pins Battery+- and Ground on the underside of the PCB board. here is the controller’s pinout schematic). The picture below shows one of the halves put together. The process should be repeated for the other half.

That’s probably the hardest part of the assembly. Now we just need to place the on/off switch in position, screw in the securing pin (part of the 3D printed case) and stick the battery to the inside of the case with double sided tape. Don’t worry, the case was designed so that there is enough clearance between the top of the battery and the underside of the PCB board. Here is a picture showing these components in place.

3D Printed Case

I designed the 3D printed case to fit the Corne keyboard with a PCB top plate from Boardsource, in addition to the components described above. Once all parts are in place, the top plate is screwed into the case. The screws, which are included in the keyboard kit, go through the top plate into standoffs raising from the bottom of the case. The standoffs are designed so that these brass inserts can be installed on top, ensuring a secure and solid assembly (see here for directions on how to install these brass inserts on 3D printed parts).
Here are the case STL files for both halves and associated parts. I’d recommend printing in PETG, but PLA would work just fine.
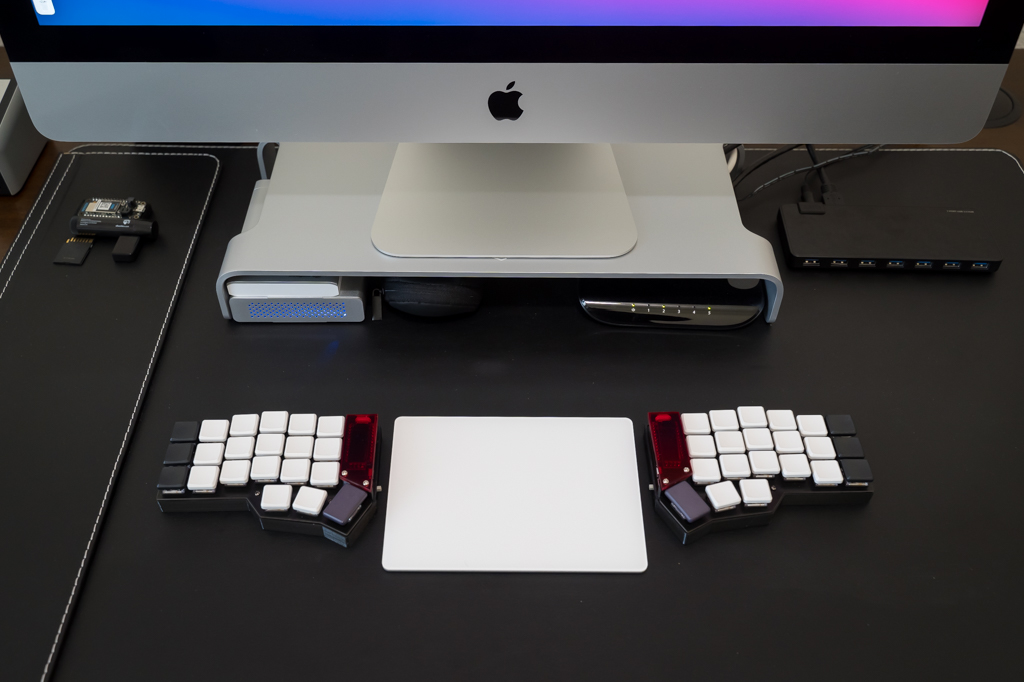
Below are a couple of pictures of the assembled keyboard. The kit that comes from Boardsource includes transparent acrylic top plates to protect the OLED screens. For this build, I just bought an acrylic sheet, cut it to size and used that instead.


Firmware
There are several firmware options for wired mechanical keyboards, but not so many for wireless keyboards. After some research, I decided to go with ZMK. Although ZMK is a relatively new project, it is in very active development, with fairly good documentation and support.
Side note: Big shout out to Pete Johanson for putting together such an amazing project and for providing excellent support. Also, their Discord server is full of people always willing to help.
ZMK is compatible with the Nice!nano controllers used in this build. Head over to their documentation page for instructions on how to install it and customize it. Note this is not a straight forward process. You should be comfortable with basic use of GIT and willing to setup your keymap manually, in a text file (some examples here). That being said, once you have everything setup, the update and reconfiguration process (i.e. new/updated keymaps) is very simple.

This was a fun and educational project for me. If you have any questions on the build and configuration, feel free to ask in the comments section below or head over to the Discord server.