- Welcome to Moving Electrons!/
- Posts/
- HomeKit Compatible Freezer Temperature Monitoring System - ver 2.0/
HomeKit Compatible Freezer Temperature Monitoring System - ver 2.0

Table of Contents
Project Summary #
This is version 2.0 of my original project for monitoring freezer temperature. The first version was created quickly to meet an immediate need but had limitations that made it less practical in certain situations (e.g., power outages). This new version introduces the following improvements:
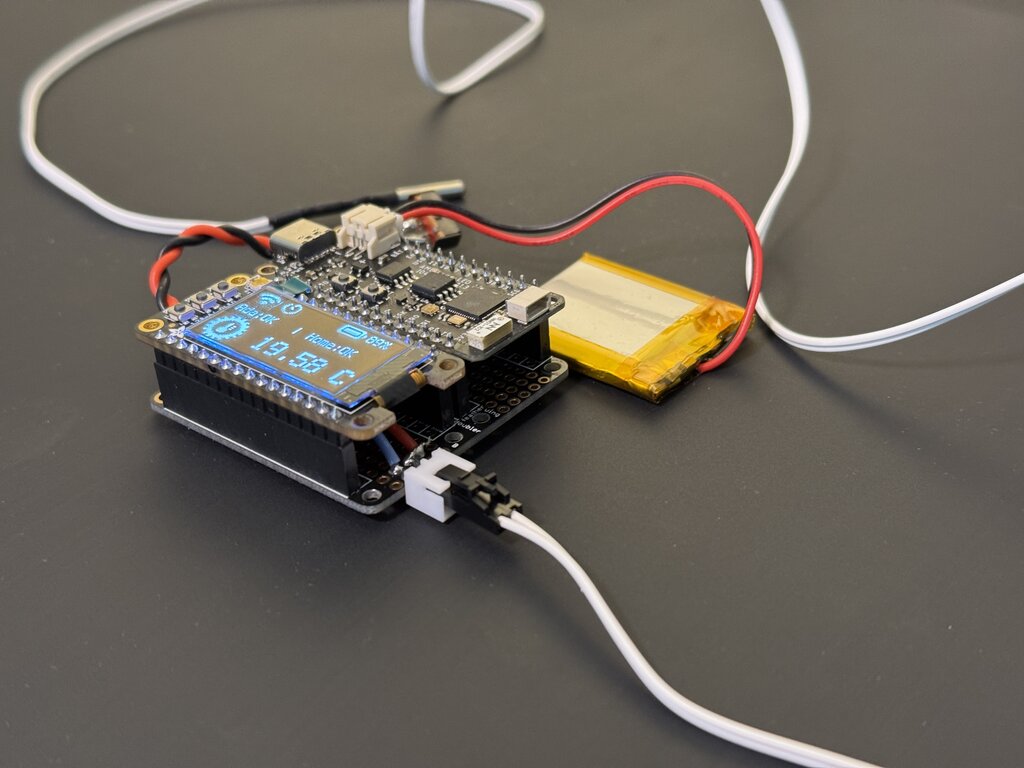
- Dual power support: The board now operates on both battery and USB power. During a power outage, it automatically switches to battery power and recharges when power is restored.
- Integration with Home Assistant: Replaces Homebridge, enabling compatibility with other open systems in addition to Apple’s HomeKit. Home Assistant also supports two-way communication with the device.
- Temperature measurement via thermistor: Improves durability by reducing susceptibility to humidity or freezing damage compared to integrated circuits.
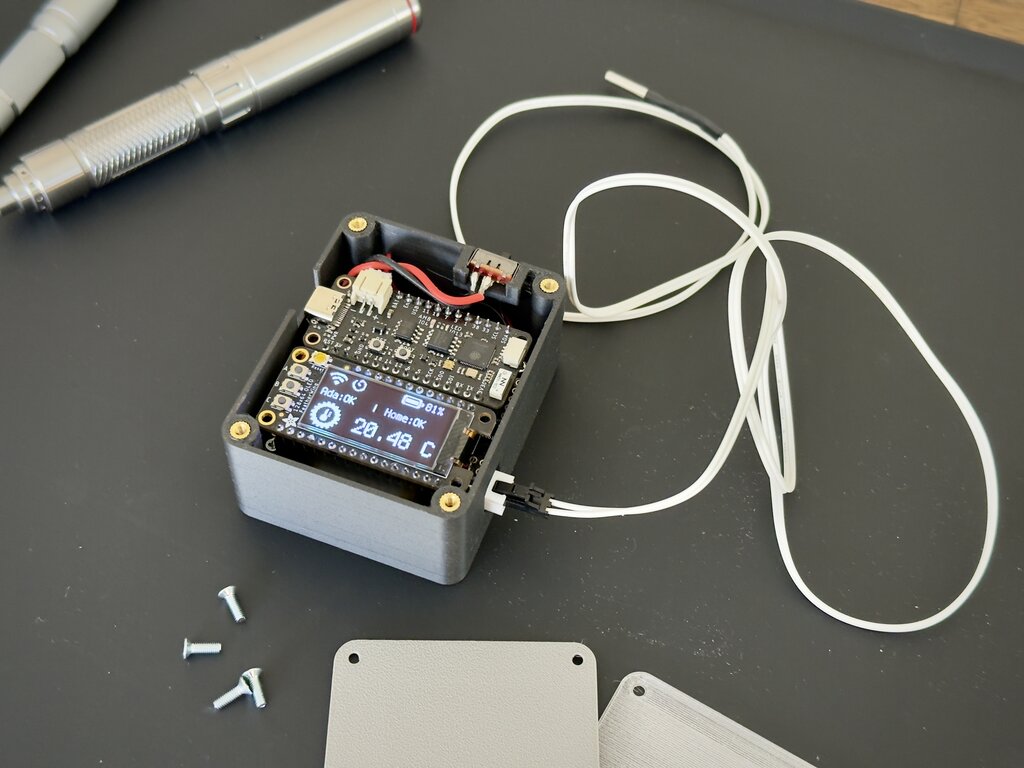
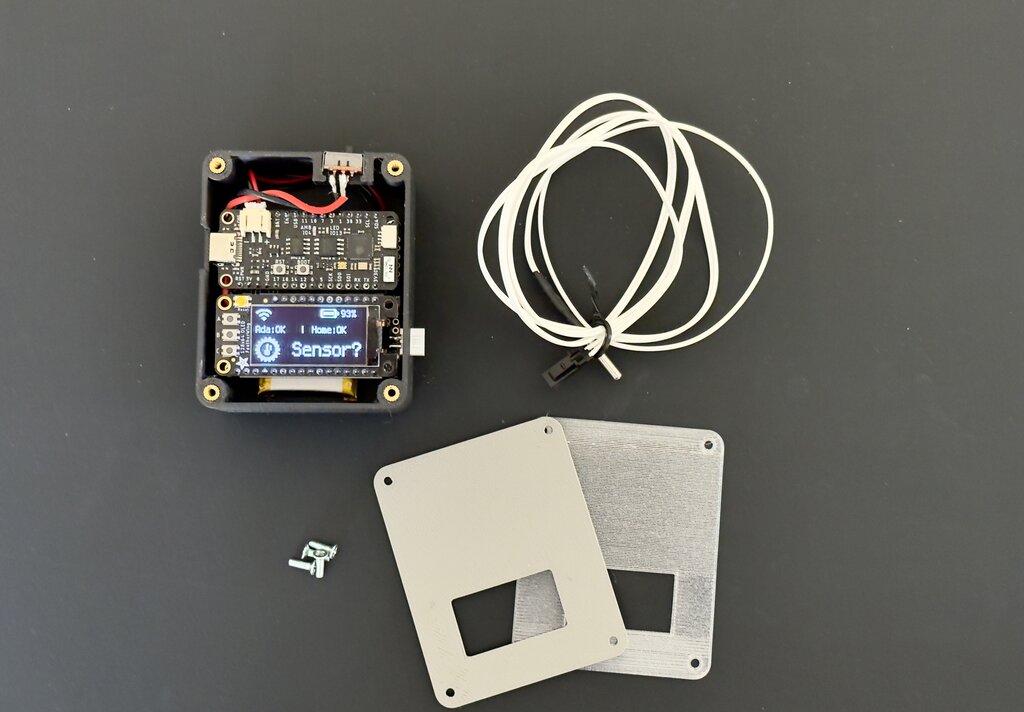
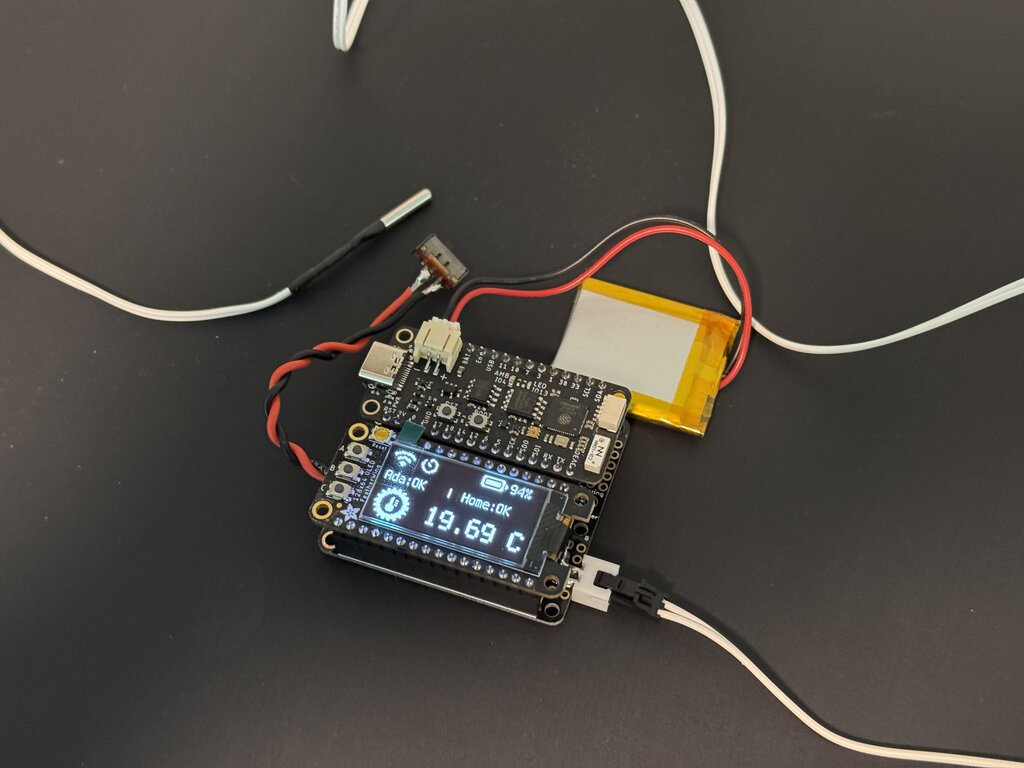
- OLED display: It shows temperature value, WiFi connection, status of connection to MQTT broker, Adafruit.IO connection as well as timer and alarm indicators. To prevent OLED display burn-in — an issue observed in a prototype that ran for months — the display turns on momentarily when booting up and when button “C” on the board is pressed. It turns on and stays on when the high temperature alarm is active or when the temperature sensor (i.e. thermistor) is disconnected.
- MQTT implementation: Reports both temperature values and high-temperature alarm.
- Remote configuration: Allows setting alarm thresholds and delay times through Home Assistant.
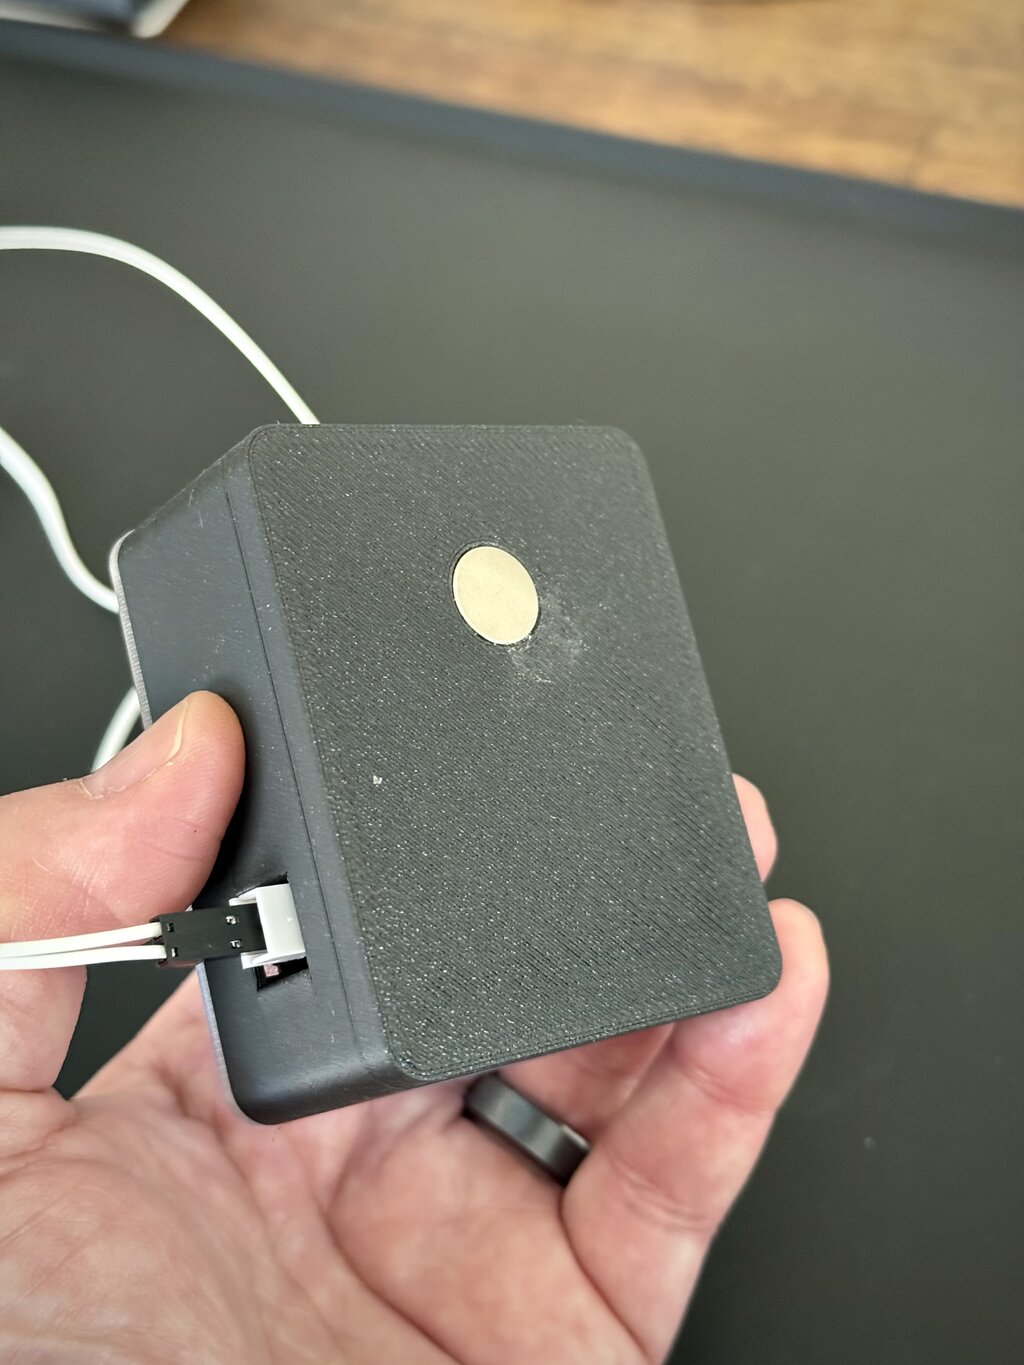
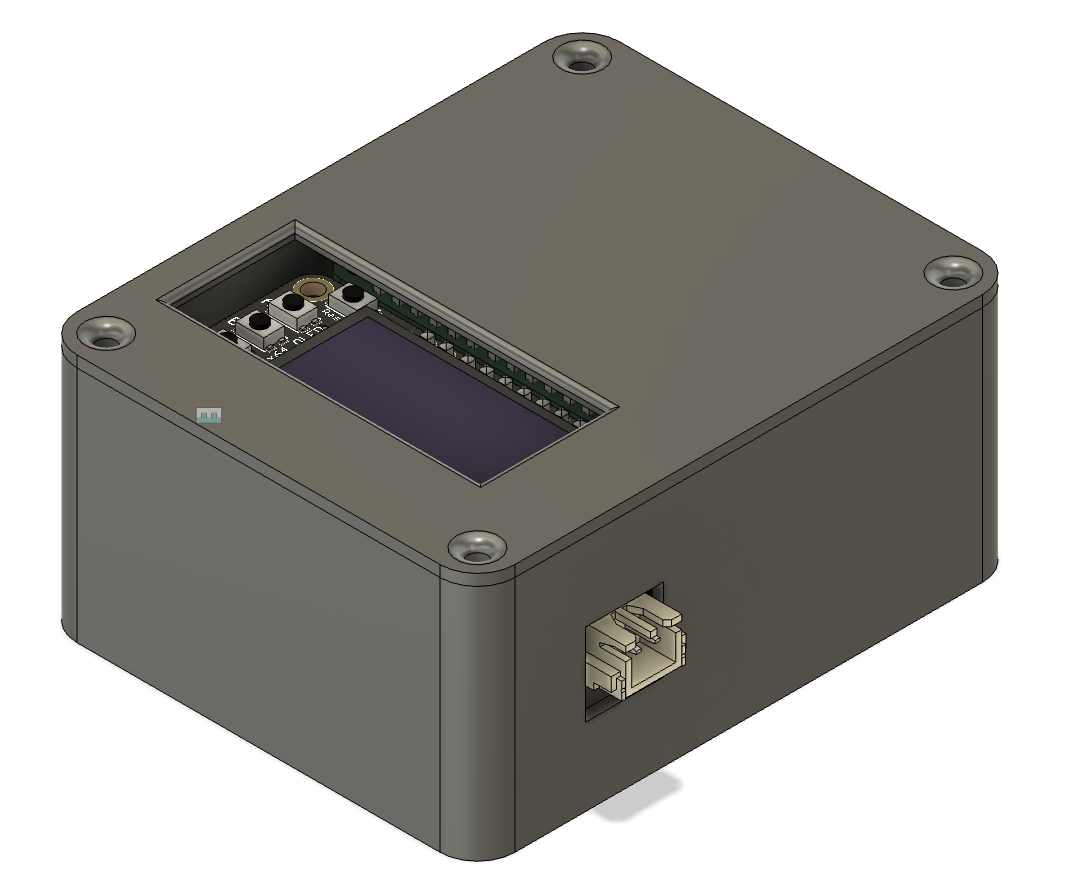
- Upgraded 3D-printed case design: Holds the board, OLED display, and Li-Ion battery. The lid now has a wider opening for button access and includes space for a magnet to attach the device to the freezer.
- Sensor disconnection detection: Displays “Sensor?” when the thermistor is not detected.
- CircuitPython code enhancements: Includes several logic improvements for better performance.
The short video below shows assembly, final tests, installation and operation:
Hardware #
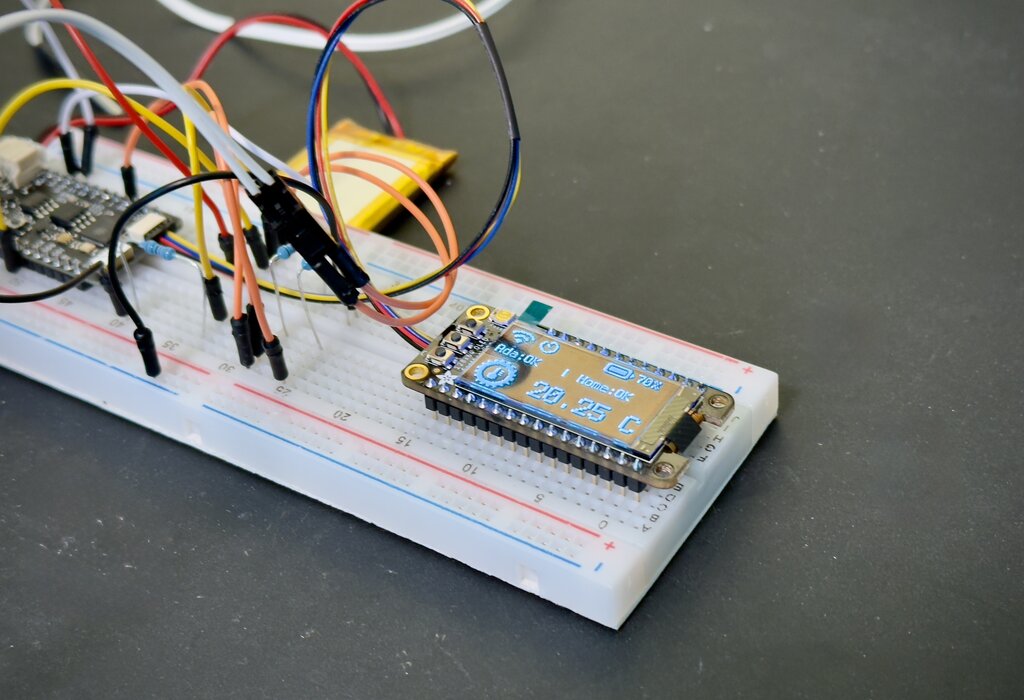
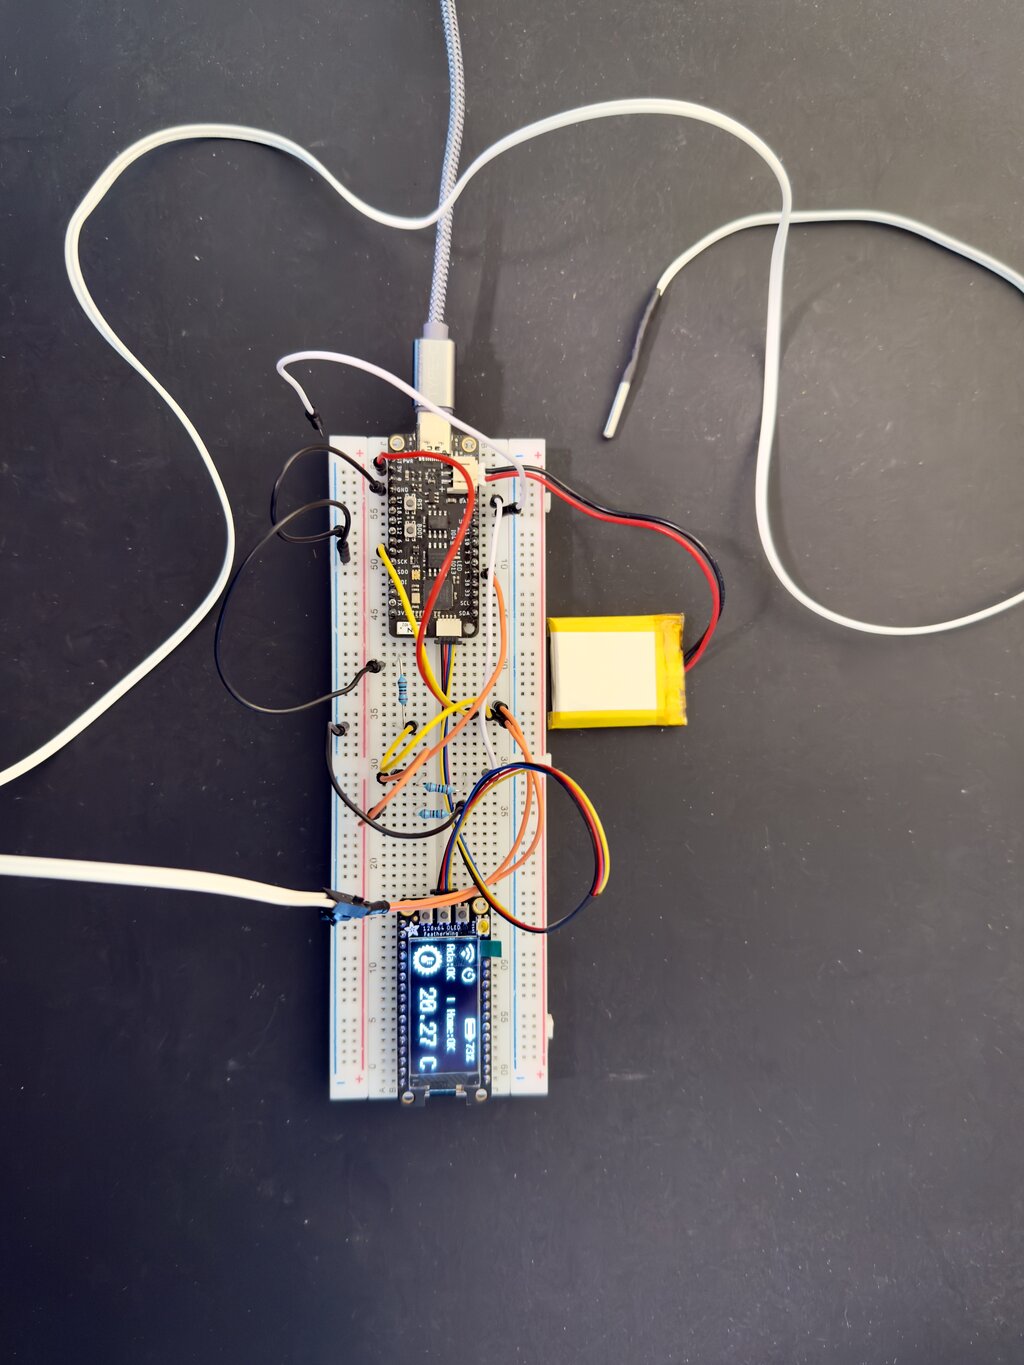
Several of the improvements mentioned above could be implemented thanks to some hardware upgrades. Version 2 uses the same controller board, the Unexpected Maker FeatherS2 board, which can handle the extra hardware and processing with no problem. However, while the first version focused on quick assembly and “no soldering”, this version is a bit more involved.
Temperature Monitoring Device #
Component List #

- Unexpected Maker FeatherS2 board.
- Adafruit 126x64 OLED display Featherwing board
- 500 mAh Li-Ion battery
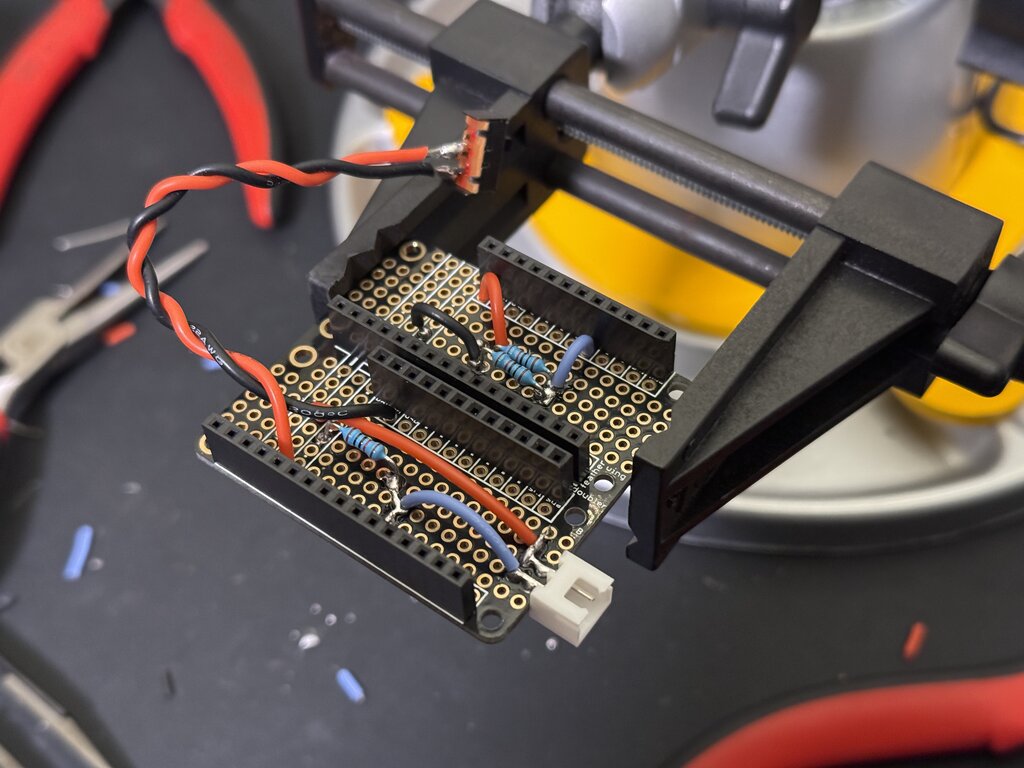
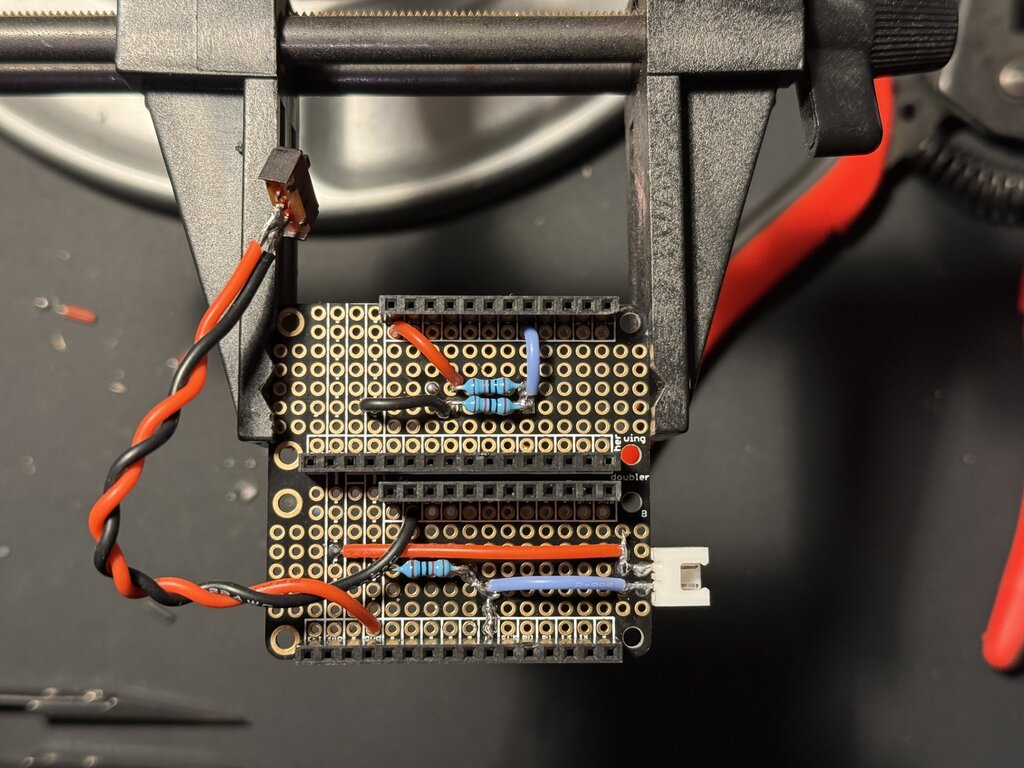
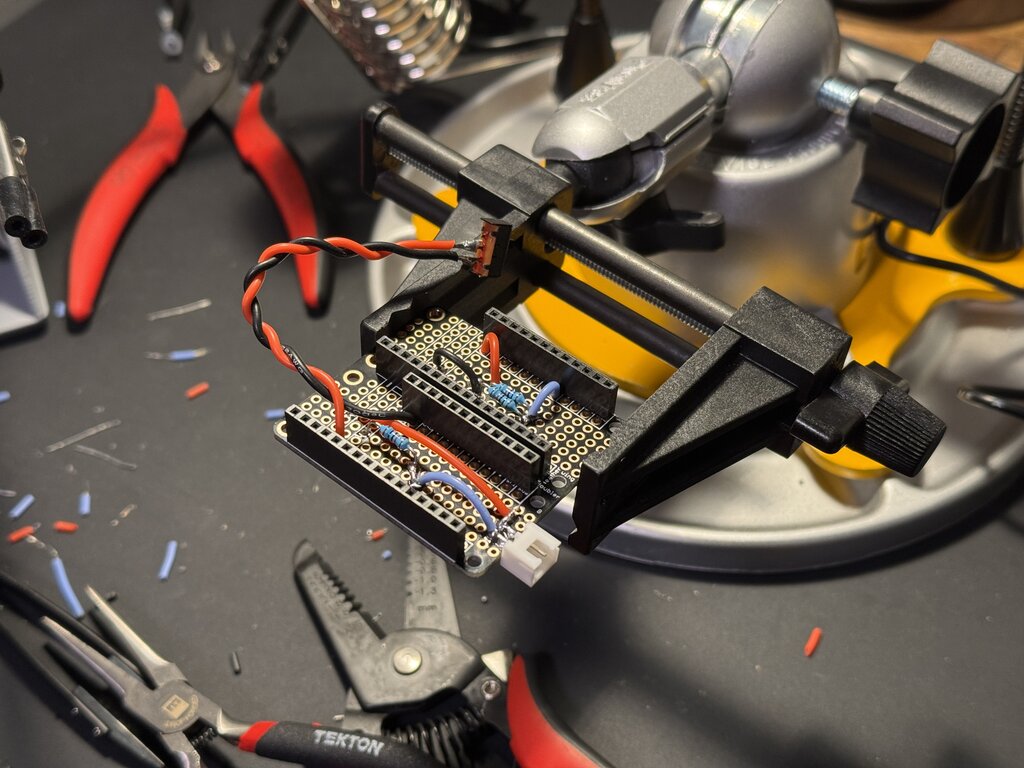
- Adafruit Featherwing doubler
- Thermistor
- Three 1/4 Watt 10 kOhm resistors for the voltage divider
- Regular two-pole switch (11mm x 3.7mm). This is the closest one I could find online.
- JST plastic connector. I couldn’t find one that would fit the thermistor connector perfectly.
- 22 AWG or 24 AWG silicone insulated wires
- 12mm x 3mm Magnet or smaller, to be attached to the back of the case
- Miscellaneous materials like screws M2.5mm x 8mm, associated brass inserts (optional) and 3D printing PLA/PETG filament if you’ll be doing the 3D printing yourself.
Some soldering is involved to build the voltage divider inside the Adafruit doubler. The good thing is that is not complicated at all if you have some experience. I’ve included some pictures of the process below.
Home Assistant Device #
I installed Home Assistant on a Raspberry Pi 4 that I had available. However, I’m planning to migrate the installation to a Raspberry Pi 5 because of the superior performance. I just got this kit in the mail that seemed to be a solid option. It includes all the hardware needed to have it up and running at a reasonable price.

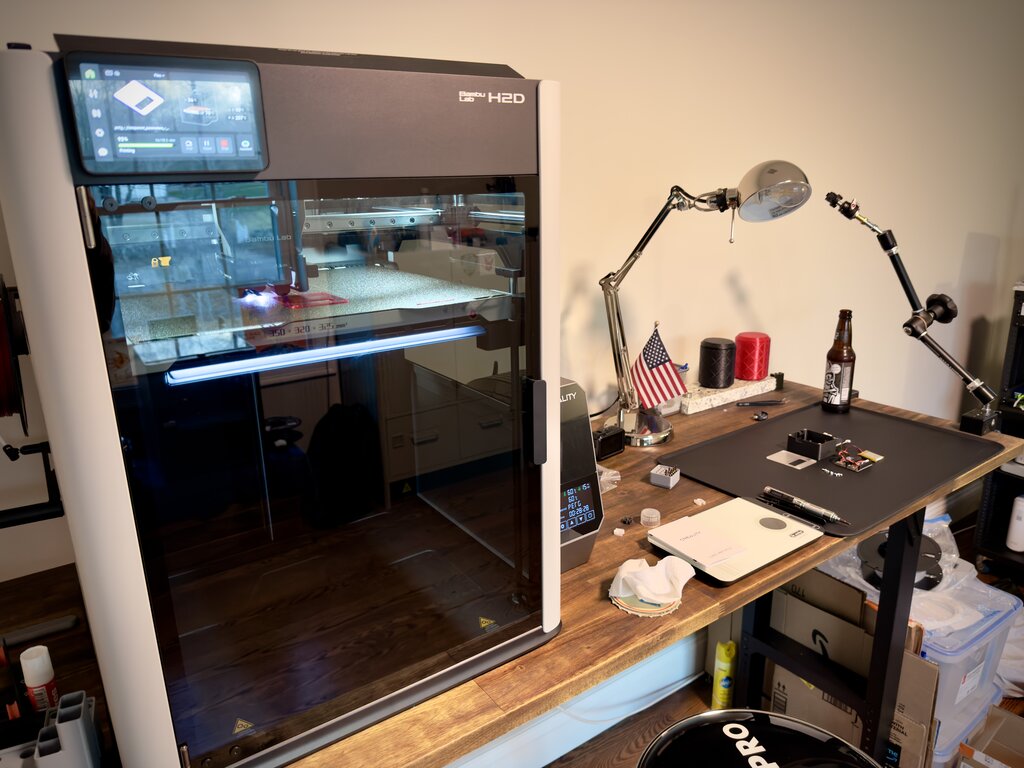
3D Printed Case #
This was an good opportunity to test the Bambu Lab H2D printer, and I’m very impressed with its performance. The machine truly represents a significant advancement in 3D printing technology—we’ve come a long way since the Original Prusa MK1. In hindsight, I could have printed both the case (PLA) and the lid (PETG) simultaneously, which would have saved time.

Software #
Microcontroller #
As with version 1.0, the Feather S2 manages all temperature sensing and alarm notification logic. In addition, it now controls OLED display rendering and power on/off functionality. I’ve released the code as open source and is available on GitHub. The repository includes:
- CircuitPython source code
- CircuitPython 10.x firmware UF2 files (also available from the official website)
- 3D-printed case STL files
For security reasons, the repository does not include the secrets.py file. You will need to create this file, add your local network information and credentials, and place it in the board’s root directory. The required format is as follows:
# This file is where secret settings are kept, passwords, and tokens.
# Do not commit or share this file.

secrets = {
    'wifi_ssid' : 'YOUR WIFI SSID',
    'wifi_password' : 'YOUR WIFI PASSWORD',
    'timezone' : "America/Chicago", # http://worldtimeapi.org/timezones
    'aio_username' : 'YOUR ADAFRUIT IO USERNAME',
    'aio_key' : 'YOUR ADAFRUIT IO KEY',
    'mqtt_broker': 'HOME ASSISTANT IP',
    'mqtt_username': 'MQTT USERNAME IN HOME ASSISTANT',
    'mqtt_password': 'MQTT USER PASSWORD IN HOME ASSISTANT'
    }
Note
Use the IP and port of the machine running Home Assistant instead of homeassistant.local:8123. This allows the board to connect faster to the machine running Home Assistant (no name to be resolved by DNS). Also, make sure to setup Home Assitant’s correct IP address. Failure to do so will result on the board to appear unresponsive. This is because of the way the MQTT client library was implemented in CircuitPython.
Home Assistant #
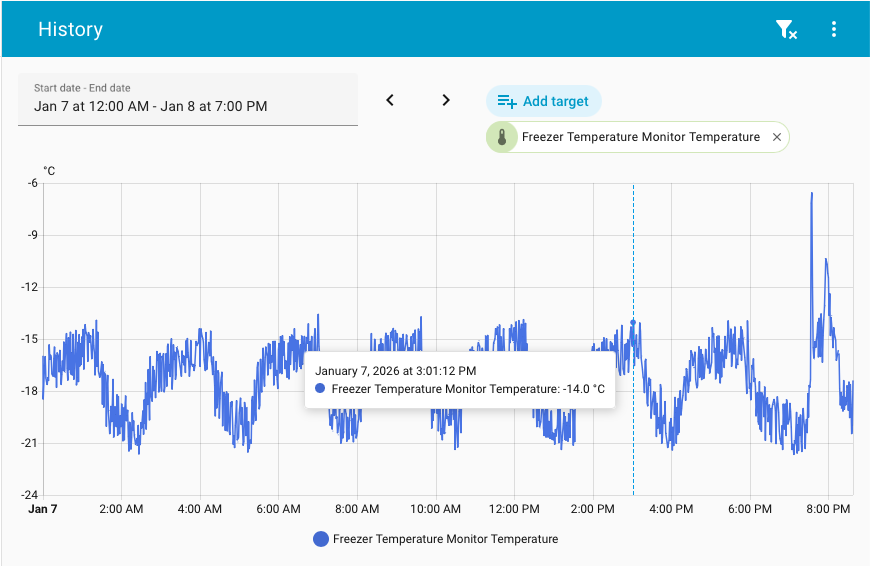
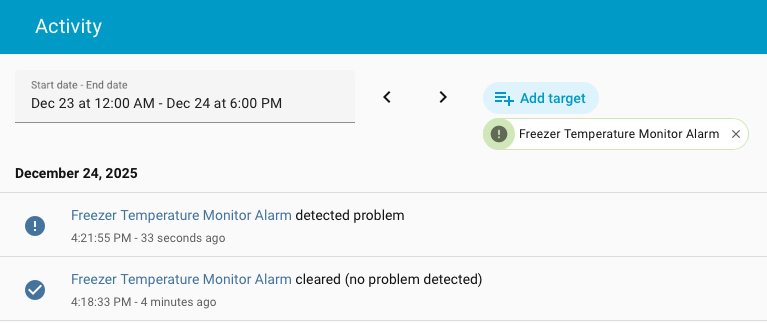
Version 2.0 relies on Home Assistant for two key capabilities: integration with Apple HomeKit and remote device setup. The HomeKit integration enables the device to participate in HomeKit automations via the Apple Home app on all platforms. Remote setup permits adjustment of the alarm temperature threshold and the alarm waiting time remotely, allowing fine‑tuning of device behavior to match the freezer compressor’s cycle. Home Assistant can also display temperature visualization graphs similar to Adafruit IO (see images below).
Home Assistant can be installed on a variety of systems, and the project also offers a Plug‑and‑Play hardware option. I opted to have Home Assistant OS installed on a Raspberry Pi; the installation process was straightforward — see this step‑by‑step tutorial for details.
Home Assistant Setup #
I won’t go into too much detail on the Home Assistant setup, there are many online tutorials and the project documentation is excellent. Some basic understanding of the MQTT protocol and how it’s handled in CircuitPython would be needed for the lines below to make sense. Adafruit as a nice guide explaining the main concepts. In a nutshell, here is what needs to be done in Home Assistant:
- Install “Mosquitto” MQTT broker as an Add-on, and then add it as a Home Assistant integration. This is important as it makes Mosquitto actions available when building Automations.
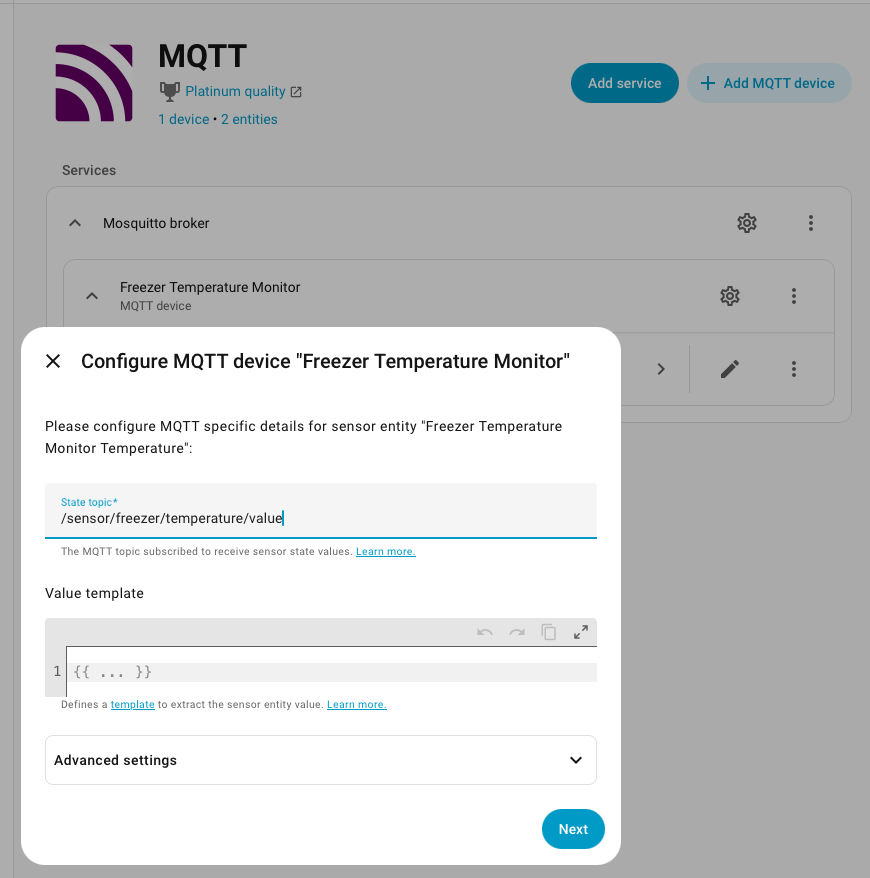
- Add MQTT devices in Mosquitto. Only two devices/entities need to be added, these are the ones Mosquitto will subscribe to, which are the ones the board will publish to. Make sure the
State topicfield in the entity configuration matches the topic path in theconfig.pyfile:
ha_publish_topics = {
	'temperature': '/sensor/freezer/temperature/value',
	'alert': '/sensor/freezer/temperature/alert'
}
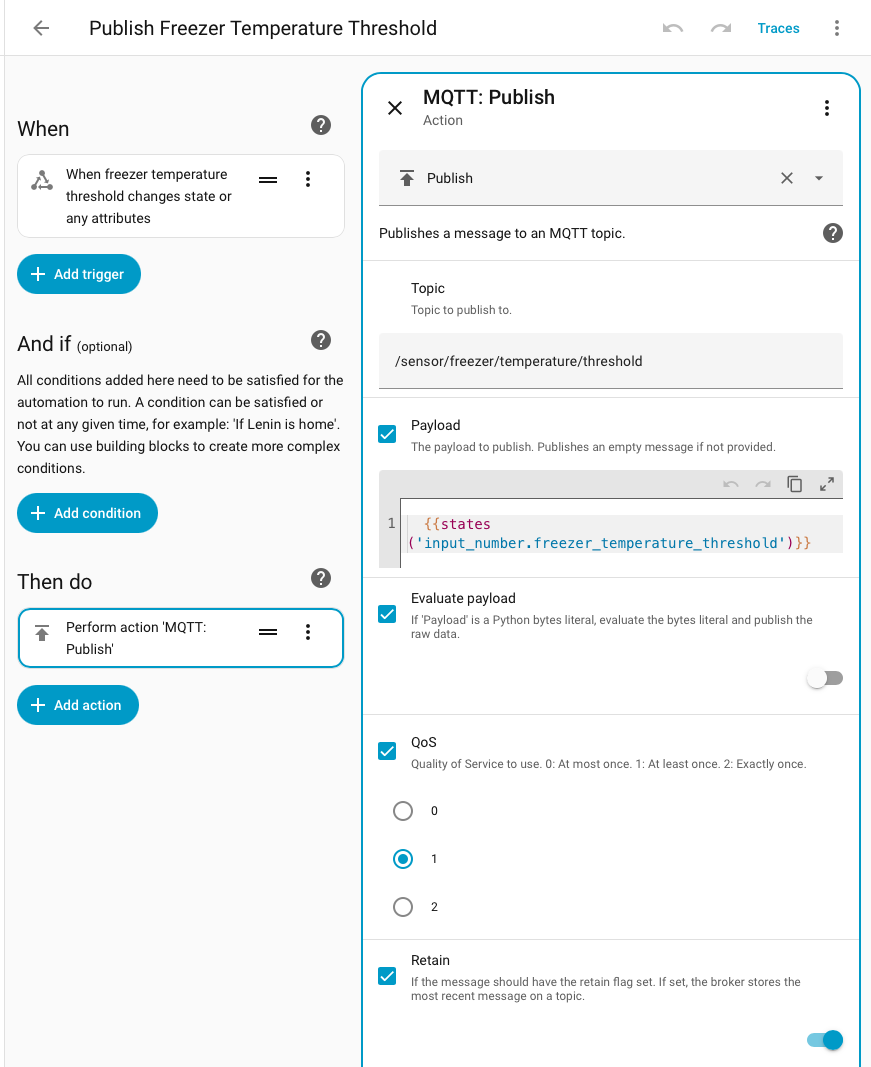
- Create two Helpers in Home Assistant (Settings > Devices & services) of the type Number. These can be thought of as Home Assistant variables that will hold the values of the two parameters that will be modified remotely on the board: the threshold temperature and the alarm waiting time.
- Create two Automations in Home Assistant (Settings > Automations & scenes). This is how data will flow back to the temperature monitor device. Each automation is triggered by a change in the corresponding Helper value. When triggered, an MQTT Publish action sends the modified value to the matching topic. The
Topicfield must match the corresponding path in the following section of theconfig.pyfile:
ha_subscribe_topics = {
	'threshold': '/sensor/freezer/temperature/threshold',
	'waiting_time': '/sensor/freezer/temperature/time'
}
Note
When booting up, the MQTT client running on the board reads the last value in a “topic” it is subscribed to as long as the MQTT broker running in Home Assistant published that topic with he retain flag on. The message is read on the first call to mqtt.loop in the code.
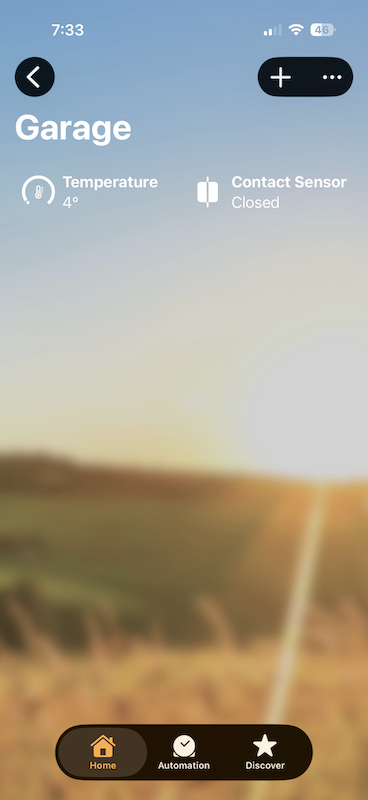
HomeKit Integration #
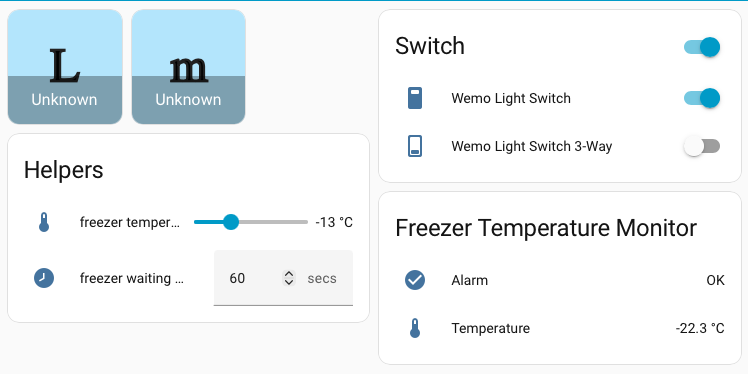
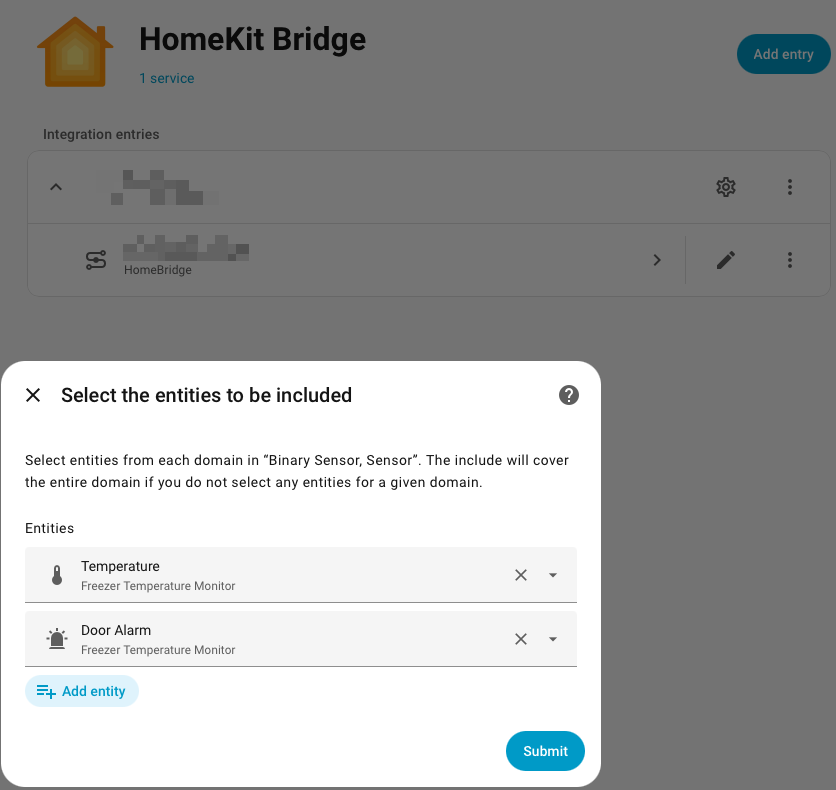
HomeKit integration is handled by the HomeKit Bridge Integration built into Home Assistant. Just look for it and install it. Then, select the entities that need to be exposed to HomeKit (see image below).
Note: For HomeKit to detect the temperature alarm as a “Contact Sensor”, it should be setup as “Door” or “Opening” in both the MQTT class (in the Mosquitto settings) and in the entity configuration in Home Assistant.
Adafruit IO #
Adafruit IO is a platform designed by Adafruit to display and interact with IoT projects. It’s very easy to get started with, has a great user interface, powerful visualization tools and rock solid connection. They offer a very permissive free tier, just be mindful of their servers and don’t hit them with many requests. I haven’t found a better or easier way to interact with IoT projects.
The Adafruit.IO configuration also resides in the config.py file, modify the following section to match your own setup:
aio_feeds = {
	'temperature': 'freezer-temperature',
	'alert': 'freezer-temperature-alert',
	'voltage': 'freezer-battery-voltage'
}
