Background Information
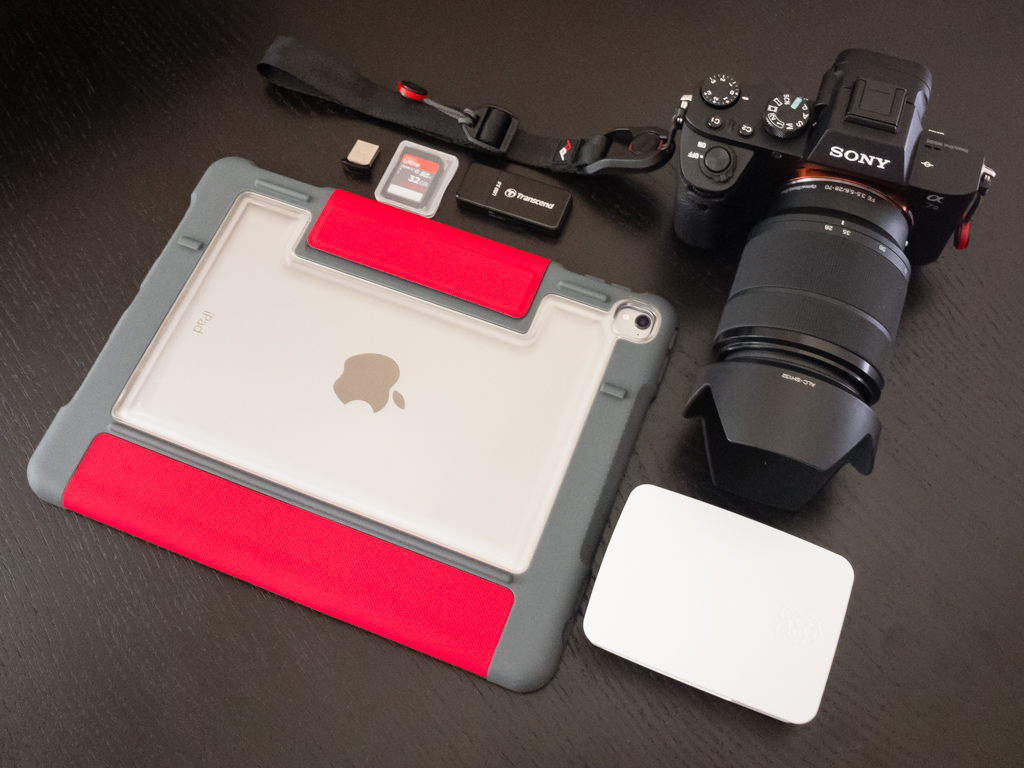
This is Part II of a series of posts on backing up photos while traveling using a Raspberry Pi and an iPad Pro. In Part I, we covered how to set up both the Raspberry Pi and the iPad to be able to establish a secure (i.e. SSH) connection between them and manually run a script to copy photos from an SD card to a thumb drive (both connected to the Raspberry Pi’s USB ports). Here is a general diagram:
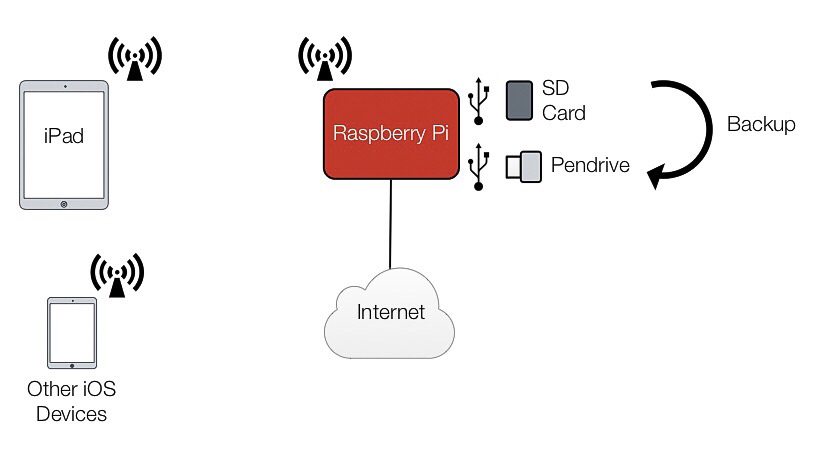
Although perfectly functional, fast and more importantly; reliable (unlike other options I’ve tried before), the process involves some manual operation to get into Raspbian’s command line (CLI) and actually run the Python/shell script.
In this post, we’ll simplify the process to operate the Raspberry Pi by using iOS Today Widgets, like so:
a) Initiate the Backup Process
- Insert the SD Card and turn on the Raspberry Pi.
- Connect to the Raspberry Pi’s WiFi network from the iPad.
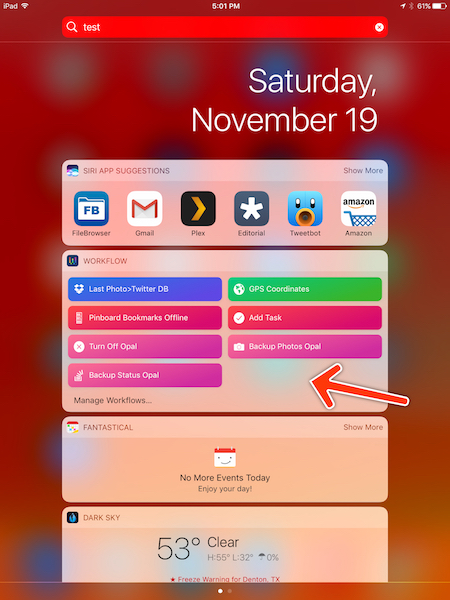
- Slide down from the top of the iPad’s screen to access the Today Widgets, tap on “Backup Photos” and enter the SD Card label.
Once the backup process is initiated, there is no need to keep the iPad connected to the Raspberry Pi, just disconnect from its WiFi network and let it finish the backup process.
b) Check if the copy process has finished
Just slide down and tap on the appropriate icon on the Workflow Today Widget while connected to the Raspberry Pi’s network. A Pythonista script will be executed and will show on screen (within Pythonista’s console) the date and time the backup process initiated and finished (if it was finished, that is). It will also show the previously run backup tasks in chronological order.
c) Turn Off Raspberry Pi
You guessed it, the same as above. Once the backup process is completed, just slide down from the top of the screen and tap on the appropriate icon on the Workflow Today Widget to turn off the Raspberry Pi.
This is what the Today screen should look like on the iPad once everything is setup (Note: Opal is my Raspberry Pi’s name):
What’s Needed
In addition to the hardware described on Part I, we’ll be using the following software:
On Ipad
- Pythonista App for interacting with the iPad over SSH and running Python scripts.
- Workflow App, one of my favorite apps. We’ll use it to trigger the Pythonista scripts from the iPad’s Today screen.
- Pythonista scripts for initiating backup process, checking if process is completed and turn off Raspberry Pi . They are all in this zip file. Just put them within a folder in Pythonista.
- Workflows for Workflow App. These are very simple workflows for running the three Pythonista scripts for backing up photos, check backup status and turn-off the Raspberry Pi.
Note: keep in mind I’m using an iPad, but pretty much any iOS device running iOS 10 or later can be used.
On Raspberry Pi
- Python script. This is a slightly modified version of the script used on Part I. I have this file in folder
/home/pi/scripts/.
Configuration
No further configuration is needed on the Raspberry Pi side (other than using the most recent Python script). You might want to delete the file backup_photos.output from time to time in the scripts folder on the Raspberry Pi as it contains a log of all previously run backup tasks. Don’t worry, it will be recreated the next time the script is run.
On the iPad, all the heavy lifting will be done by Pythonista, more specifically the SSH_Command.py script, which will be called from the other scripts to execute commands on the Raspberry Pi.
Pythonista App
Let’s start by setting up the Username and Password that will be used to connect to the Raspberry Pi. I didn’t want this information to be out in the open (i.e. hard coded in the scripts), so I’m using one of Pythonista’s modules to store that information in the device’s Keychain, so it’s encrypted, persistent and can be used by other scripts.
In order to store the device name, username and password in the keychain, just run the script Keychain handler.py using “s” as an argument (no quotes), it will walk you through the process. To see the devices and usernames stored in the keychain, just run the script with “l” (no quotes) as an argument. Remember, to run a script with an argument, tap and hold the play/run button on Pythonista and enter the argument.
The other Pythonista scripts are very similar between them. You’ll notice a command is setup in the first few lines, which is then passed to SSH_Command.py in order to be executed on the Raspberry Pi. The last line on the scripts has the following structure:
sshc.execute('IP', port, 'ComputerName', 'Username', command)
All the arguments but command, need to be substituted with the appropriate information:
IP: Raspberry Pi wireless IP.
Port: Port on the Raspberry Pi for SSH connection (usually port 22). Note it should not be between quotes (’’).
ComputerName: Name of the device (i.e. Raspberry Pi) stored in the Keychain.
Username: Username stored in the keychain.
Workflow App
There isn’t much to configure on the Workflow App after installing the workflows (links in previous section). Each Workflow uses the Run Script block to call the correspondent Pythonista script (.e.g. /SSH Scripts/Backup Photos.py). The scripts should be set to run on Workflow’s Today Widget.
Putting it all together
Below are examples of the final screens after each script is run.
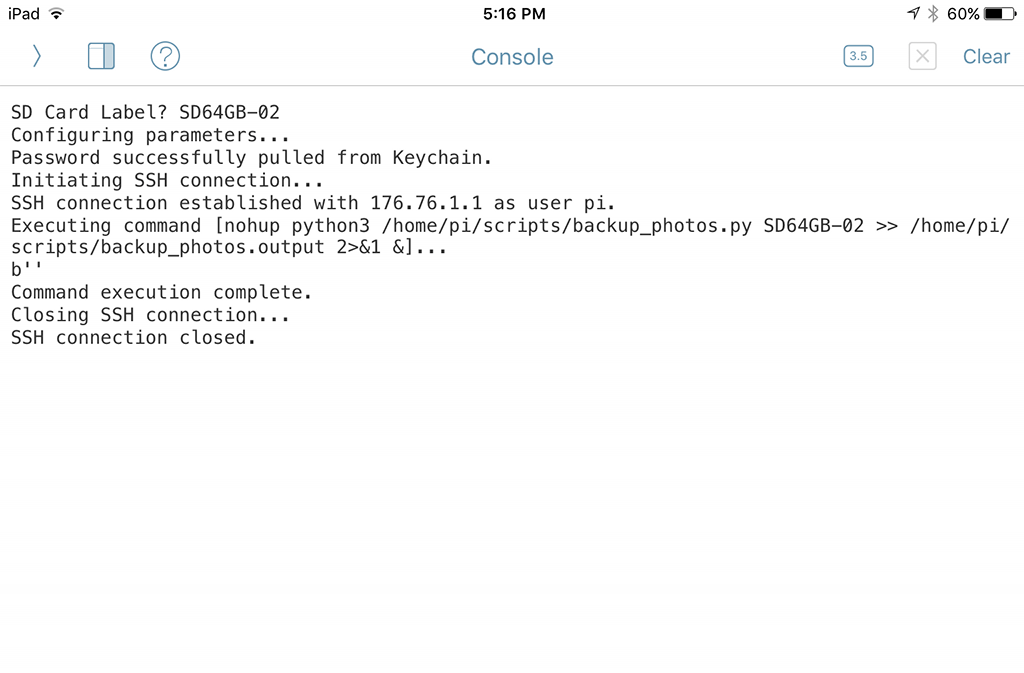
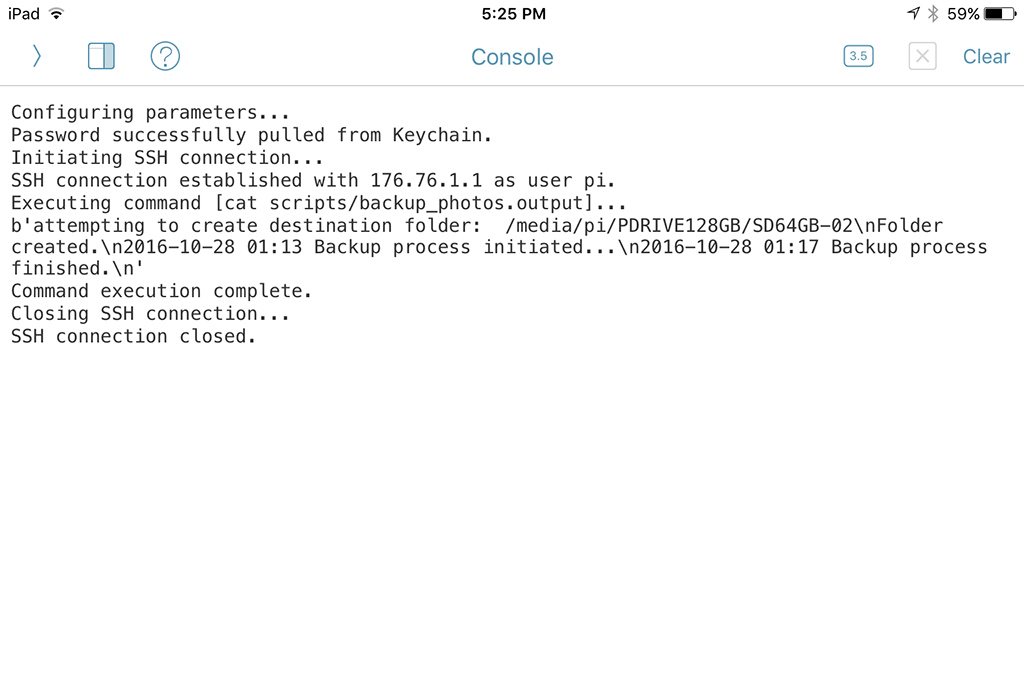
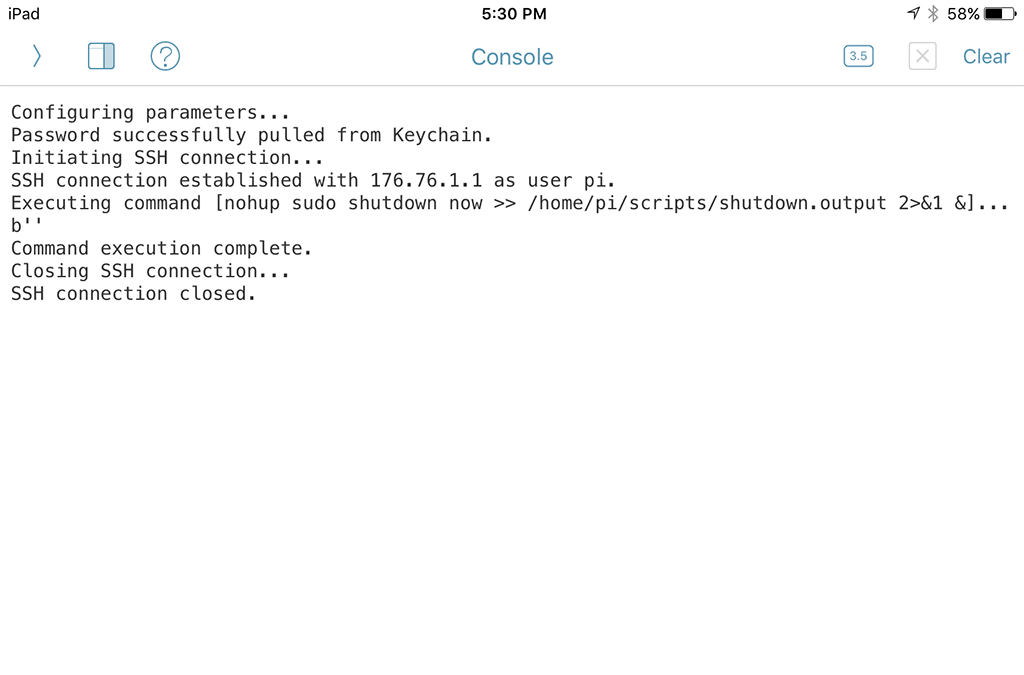
This backup process runs in a fast and reliable way. However, there is still room for improvement. For example, the output of the Pythonista script for checking the status of the backup process can be revised to make it look nicer. Also, workflows can be integrated with other Apps or be revised to use native iOS notification windows.
I’ll try to work on those and other improvements in future posts. In the meantime, feel free to revise and modify the scripts and workflows as you see fit.